
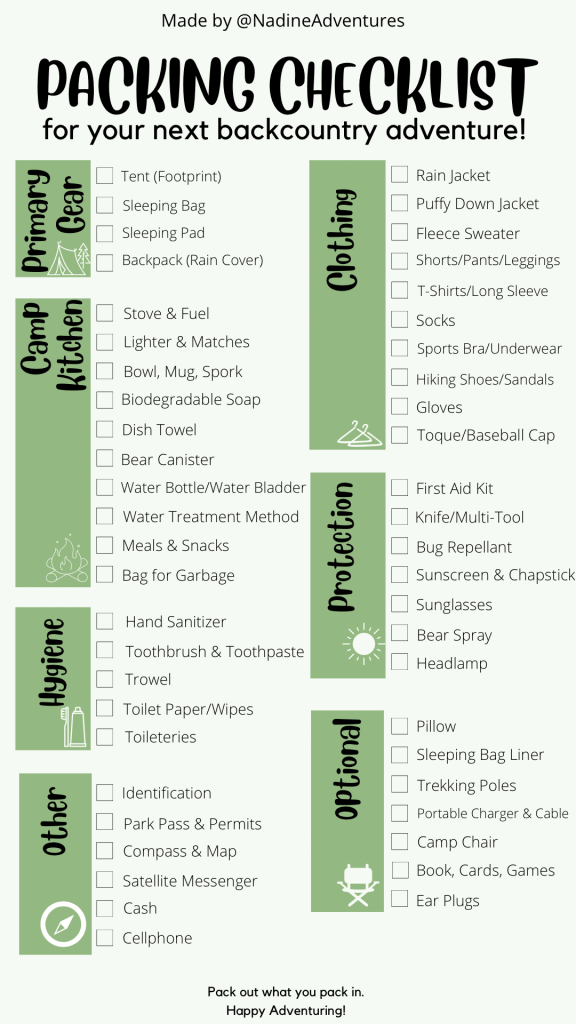
If you know me well, you know I can’t function without making lists. That’s why I decided to create a resource, to make packing for my backcountry adventures way easier! Here, I list all my essential items I bring on all my backcountry trips, including some luxury items.
Primary Gear
I consider these items as the core of any backpacking adventure. You can shop at your local outdoors stores, or even check Kijiji or Facebook Marketplace for secondhand options, as these can certainly add up in cost.
Tent (Footprint)
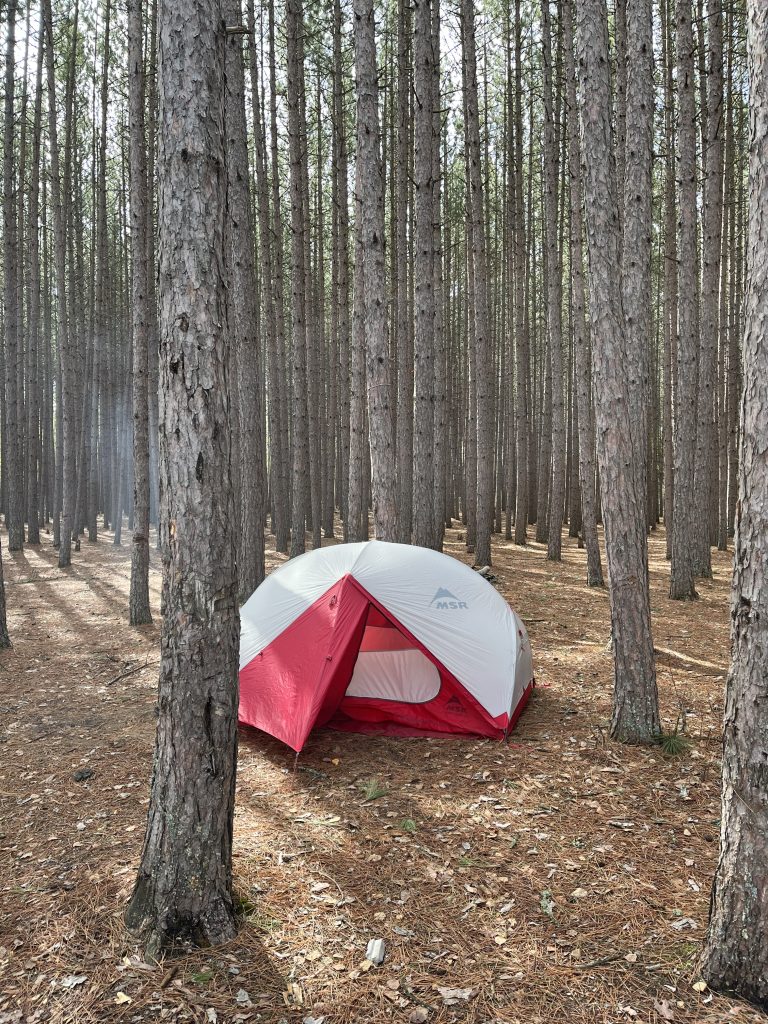
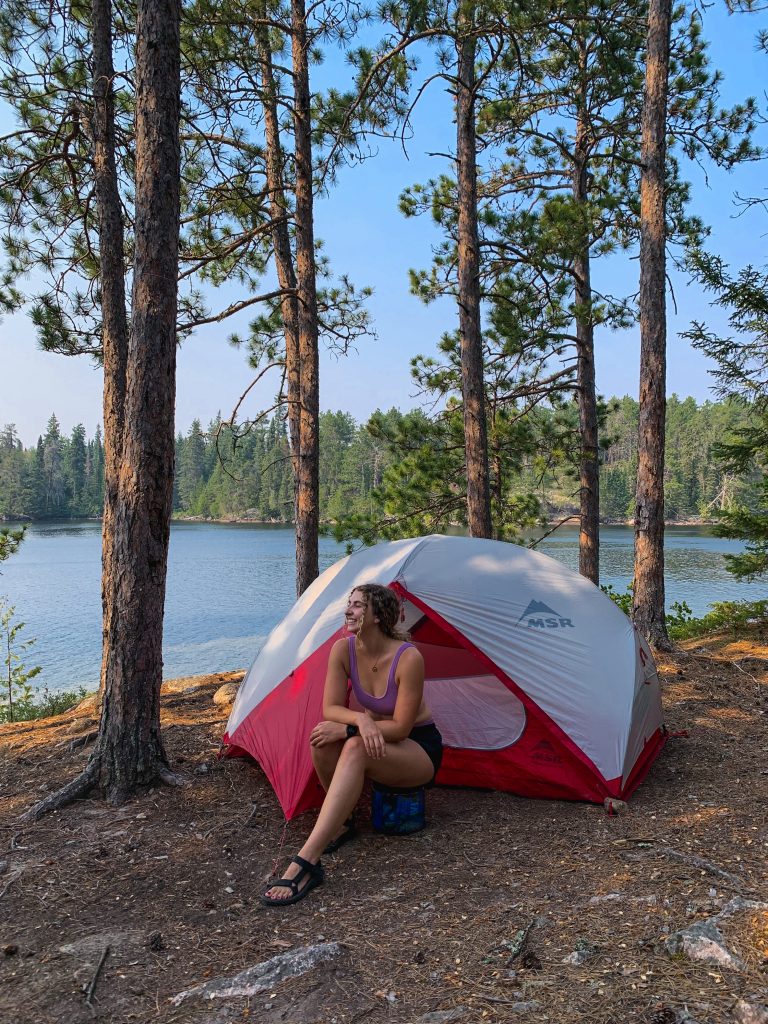
MSR – Hubba Hubba NX 2 person tent
When choosing a tent, I had debated whether I get a one person or two person tent. Ultimately, I picked a two person tent – that way someone can easily join me on my adventures or I can have some extra space when going solo. This particular tent has two entrances, perfect for if you need to get out and not wake up your buddy. It also has two vestibules, where I like to keep my backpack overnight. The Hubba Hubba NX is a lightweight 3 season tent, perfect for the backcountry adventurer. I recommend also purchasing a tent footprint to protect the bottom of your tent. This will make your tent last longer. You could even just bring a tarp to lay down.
Sleeping bag
Marmot – Women’s Radium 20°F/-7°C Regular Down
This sleeping bag keeps me toasty warm and comfortable on all my adventures. It packs well in compression sack as well. This sleeping bag was recommended to me by the staff at Atmosphere, and I have zero complaints so far. They do not sell this model anymore, I’ve linked something that is similar. During the spring and fall, when the temperatures are colder, I’ll add a sleeping bag liner to add extra warmth.
Sleeping pad
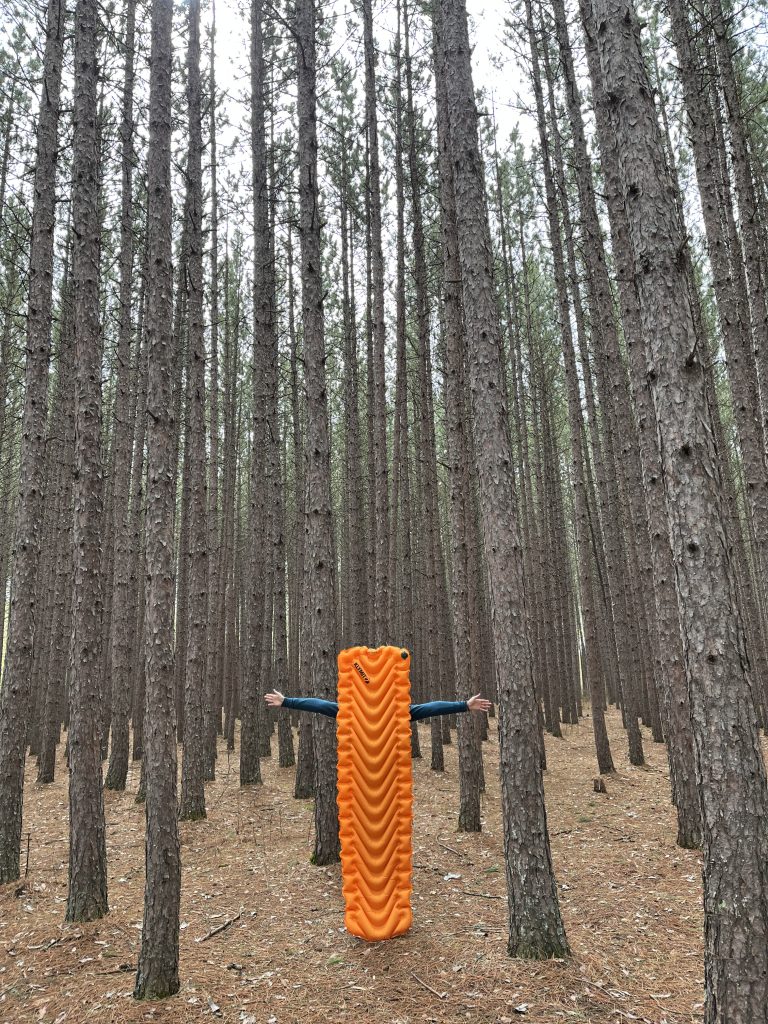
Klymit – Insulated V Ultra Lite SL
When I was looking for a sleeping pad, I knew I wanted something that packed down small and was lightweight – and that’s exactly what this sleeping pad is. With a weight of 16oz, this is the perfect ultra light sleeping pad without spending a fortune. This sleeping pad is easy to inflate, requiring around 7-10 breaths! Lastly, this Klymit pad allows you to stay warm with the klymalite lofted insulation as it creates additional warmth that lasts all night.
Backpack (Rain cover)
Osprey – Aura AG 65L
I’m quite biased and have always loved Osprey. This specific pack can either be 55L or add the pack brain to make it 65L. I recommend going to your local outdoor store, such as REI, MEC or Atmosphere, and have staff get you fitted for a pack. They’ll even add some weights when you try on packs to make it more realistic. For this particular pack, the Aura AG has a bottom compartment, this is where I store my sleeping bag, sleeping mat and pillow. I can even fit more stuff in that compartment. There is also a strap at the bottom where I typically clip in my tent. There is also a pocket to add a water bladder. Tons of space to all everything you need.

Camp Kitchen
One of my favourite parts of going on my backcountry adventures, is planning out my meals. Meals require some key items, which I’ll go further into. I bring these items with me on all my trips to ensure I eat well!
Check out this post for some backcountry meal suggestions!
Stove & Fuel
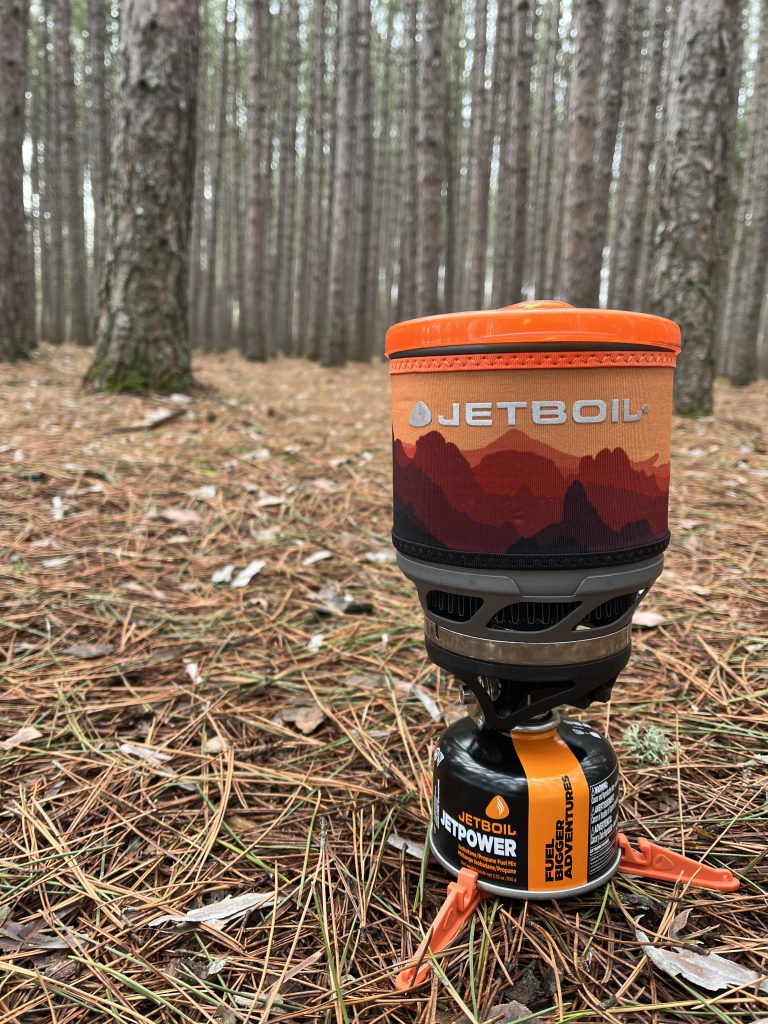
Jet Boil – MiniMo
I love my Jet Boil. It packs light and easily in my backpack. It weighs just under a pound without the fuel canister. The nice thing about this stove is that it comes with everything you need. There’s a fuel canister stabilizer that allows you to cook on uneven surfaces, which is quite often in the backcountry. When packing this away, everything fits in the cup including the canister. Lastly, I can’t forget to mention that this stove has a push button igniter meaning you don’t need a lighter/match – although I always recommend to bring a lighter/match as a camping essential. Make sure to also purchase fuel canister as this is needed for the stove.
Utensils
Personally, I only bring three utensils on all my backcountry trips. A bowl, a mug, and a spork. I’ve found that this is all I really need. Nothing more, nothing less.
I use the Sea to Summit collapsible bowl. I love how small this packs away and it’s the perfect bowl for oatmeal or some noodles.
I also have the Sea to Summit spork. Now let me get you hooked on this – the longer handle is perfect for those dehydrated meal bags, as using a shorter spork, you’d get your hands all messy with food. Second – the spork feature allows you to actually get a good grip on the food. This is one purchase I recommend to everyone. The spork is also light and packs away nicely.
Lastly, I always bring my GSI bugaboo cup. I’m not a coffee drinker, but i use a mug for tea or whatever beverage I might bring. It’s just nice to have a mug. I wouldn’t consider this as an essential, more of a luxury item depending on your needs.
Soap
Campsuds – Biodegradable Soap
My go-to is biodegradable soap, all you need is a few drops and you’re good to go. This can be used to wash your hands, face, hair, clothing and dishes.
Dish Towel
GSI – Camp Dish Cloth
Something I did not expect to use often was a dish towel, but let me tell you! I use this on all my trips. It’s perfect for cleaning my bowl after having oats, it cleans off my spork after a dehydrated meal and I also use this to dry my JetBoil.
Bear Canister
Bear Vault – BV450 Jaunt
This item will depend on the area you are camping in. Are you in bear country? What are the laws in the area you are camping at regarding food storage? I will be providing information on what I use for my area. If i know the place i am camping at has a bear box included, I will store my food and scented items in a 15L dry sack. If there are no bear boxes included, I use a Bear Canister. I chose this method, as all it requires you to do is place the canister away from your tent on the ground. There is also the method of hanging a bag to a tree, however I had no interest in learning how to do that and it seemed to complicated to me. I wanted something simple and effective. There are multiple sizes of bear canisters. I have to admit, they can be difficult to pack in your backpack, and this will take some practice to figure out the right placement – but once you get it, you’re good to go! Bonus fact, it can also be used as a seat.
Water Bottle
Nalgene – 32 oz Wide Mouth
You always want to bring a water bottle. This is my go-to, fits nicely in the side pouch of my backpack. Plus, there are so many colour options!
Water Bladder
Hydrapack – 2L Force Recevoir
When looking for a water bladder, I recommend sticking with 2L or 3L. I have a 2L water bladder, and also bring a water bottle (1L). The great thing about water bladders, is that you can keep hiking and stay hydrated. I find these totally worth it, even for those longer day hikes.

Water Treatment Method
Katadyn – 1L BeFree
There are several different types of water treatment methods, do your research to see what is best for you. I use the Katadyn filtration, as for me it’s the lightest and simplest one to use, plus it packs away small. I also bring water treatment tabs as a back up on all my trips.
Clothing
I admit, I’m still figuring out what’s the ideal amount of clothing to bring on my trips. A lot of it depends on the temperature and amount of days you’re away. This will be a general list to use. Additional items may be required pending the weather.
Click here for more details on what clothing to pack for your backcountry adventures!
- hiking shoes
- camp sandals
- rain jacket
- puffy jacket
- underwear
- socks
- sports bra
- t-shirts
- long sleeve shirts
- shorts, pants, leggings
- fleece sweater
- bathing suit
- hat (toque, baseball cap)
- gloves
Various Items
Navigation
Always good to bring a Map when going for a backcountry tip. You can opt for a physical one, or download one to your phone or some Satellite Messenger will will also have a trail map feature. Bringing a Satellite Messenger can be helpful if you’re in need of help. There is the popular Garmin InReach, which I have heard good things about. Personally, I rent a SPOT from Wilderness Supply, a local outdoors store in Manitoba for my trips. That said, it’s also a good idea to let someone know your whereabouts of your backcountry plans. You can also bring a Compass, however make sure you know how to use one if you’re bringing it.
Emergency Items
A First Aid Kit is something you want to bring on all your trips and hope to never use. You can make your own kit or purchase one at your local outdoor store. Some things I like to add to my first aid kit are the following; moleskin or leukotape; various medications such as Advil and Benadryl; various bandaids; gauzes; and tweezers. Most backpacks have their own Whistle built in, or you can bring a mini one. Make sure to also bring a Headlamp or Flashlight, this is useful in general for when it’s dark out or it you’re caught in the dark unexpectedly.
Protection
There are various forms of protection you can bring along. I always make sure to bring Sunscreen, Chapstick, Sunglasses, Bug Repellant, and Bear Spray. Make sure to pack scented items away in your bear canister. You’ll also want to bring a Pocket Knife/Multi-Tool, overall these are helpful items you may need to use. I also bring a little roll of Duct Tape, this can be used for so many things, like blisters, repair a tent, etc.
Hygiene
Bring Hand Sanitizer, good to use as your hands will get dirty throughout the day. A Toothbrush and Toothpaste – I’ve recently transitioned to toothpaste tabs, which has helped me save some room in my packing. You’ll also need a poop kit, mine includes a Trowel, some Toilet Paper or Wipes, as well as I bring a Ziplock bag covered in a coloured duct tape to put waste. It’s also a good idea to bring a whole operate garbage bag for food waste as well.
Personal Items
Make sure to bring some form of Identification. I like to bring my old ID card. You’ll also probably have your Car Keys and Cellphone. It’s also a good idea to bring Credit/Debit Card and some Cash, if it is needed before or after your trip. You’ll also need to look into Permits and Park Passes, do some research on where you’re going and have what it required.
Optional/Luxury Items
Now these are items I don’t necessarily bring on all my trips, it can depend on the length of the trail, how many days are you going for. These still deserve a mention!
- pillow
- sleeping bag liner
- trekking poles
- camera
- portable charger
- microfiber towel
- camp chair
- dry sacks
- compression stuff sack for sleeping bag
- lantern
- book
- cards or games
- buff
Please remember, you do not need to go out there and purchase every single thing on this list. Make sure to check out Kijiji or Facebook Marketplace for second hand goods. Wait for sales from outdoor shops, that is what I usually do. Or even check with your friends an family if they have any gear to borrow.
I hope you find this guide helpful to pack for your next backcountry adventure!
Happy Adventuring!
Note: there are affiliate links in this post and I may earn a small commission if you choose to purchase an item (at no additional cost to you). If you do choose to purchase something, thank you for your support!